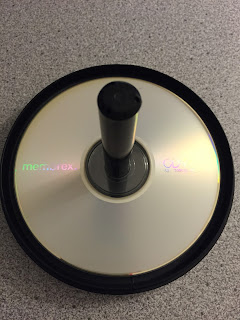
After playing with a label maker my dad had been using, I decided I was crafty enough to come up with my own way to get pretty labels onto CDs and still make them look straight and semi-professional.
Here's the tutorial:
The only material you need (besides a computer and blank labels) is an empty CD tower and the clear protector that comes in the bottom of it.
Using Word, I scaled down my document so the page on the screen was the same size as a normal sheet of paper, which in my case was 94%. If you don't know how to do this, click 'View' on the top panel, click 'Zoom', and then play with the 'Percent' until you find the number that will display the true size of your document.
Using the same method, I lined up my blank CD label sheet to ensure that my design was going to thoroughly cover the disk and nothing important was going to fall into the center hole.
Print your label.
Drop the clear protector onto your empty CD tower. This keeps your data-filled CD from getting scratched. Place your CD on the tower label side up.
Remove the label from the paper. Hopefully, the brand you choose has the handy little holders like mine did because they can be quite useful.
Carefully slide the label down the tower and let the center pole help you line up your label.
Once your label is applied, tear away the holders and smooth down all the edges of the label so nothing will get off balance when the disk is spinning in a machine.
 |
| Please visit my website www.AshleyGesslerSHD.com |


No comments:
Post a Comment